You may find that you'd like to create additional WordPress Users which can log into your WordPress Dashboard for a variety of reasons. For example, to contribute in writing posts or to troubleshoot technical issues you're experiencing.
Creating a new WP User and adjusting their permissions (or "Role") can allow you to not only ensure your own personal login details are kept safe, but help control what sort of changes the secondary user can make within your dashboard.
CREATING A NEW USER
1 ) Navigate to WP Dashboard > Users
2 ) To create a new user, click the "Add New" button at the top of the page.
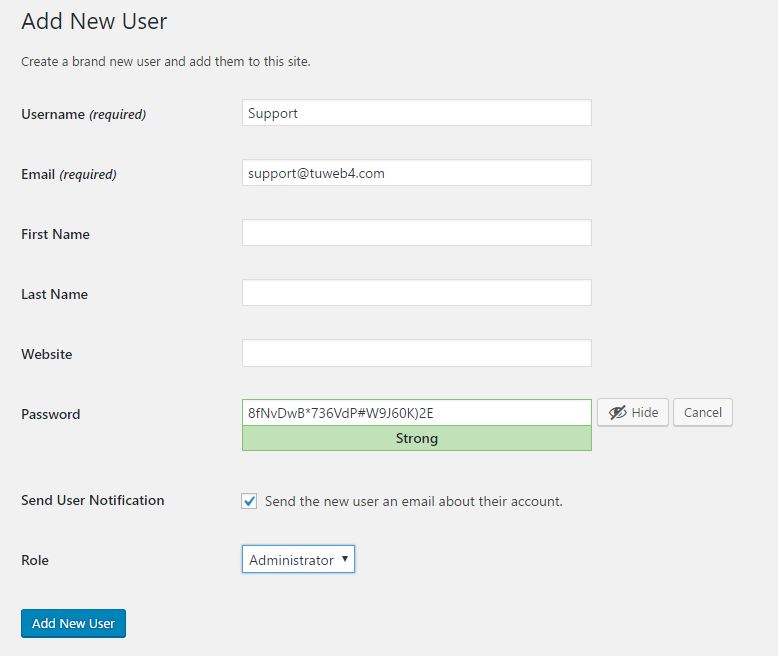
3 ) Enter the new Username and Email Address (required).
4 ) Fill in the user's personal details like Name and Website, if wanted (not required).
5 ) Click the "Show Password" button.
This will automatically generate a random password. If you are creating a password for a colleague, you can change it to whatever you wish. If you are creating a new WP User for a technical support representative to log in and troubleshoot an issue, it's fine to leave the temporary password as-is.
6 ) Choose if you'd like to email this person a notification (not required).
7 ) Select the user's Role.
There are 5 different WordPress User roles to choose from. Each role will affect what areas of the dashboard this person can access or control.
- SUBSCRIBER: Someone with very basic access, like editing their personal profile.
- CONTRIBUTOR: Someone who can create and edit their own posts, but who cannot publish the post themselves.
- AUTHOR: Someone who can create, edit, and publish their own posts.
- EDITOR: Someone who can create, manage, and publish posts for themselves and other users.
- ADMINISTRATOR: Someone with full access and permissions.
If you are creating a new WP User for a technical support representative, you will want to provide them with an "Administrator" role.
8 ) When finished, click the "Add New User" button.
EDIT USER
You can always navigate back to the WP Dashboard > Users screen and select the user you would like to manage. Here, you can change a variety of personal details about the user, including their name, adding biographical author text, social media usernames, change passwords, and more.