3. How do I translate my Breena's Theme to another language?
4. How do I set up Breena's Instagram footer widget?
5. Setting up your Newletter Widget
6. How to change the background color of the comment section?
7. How to create a static homepage & separate blog page?
8. How To Import XML Files?
9. Creating additional WordPress Users
10. Breena Child Theme
11. How to Paginate a Post?
12. How do I set up my navigation menu?
13. How do I create a Contact page?
14. How do I import the demo content?
15. Add a newsletter sign-up form to Breena
16. WordPress Theme Installation (Incl. Demo Content and plugins)
17. How to Include Google Analytics Tracking Code?
18. How to Include Custom CSS?
19. How can I customize the background to the body?
20. How do I add a Featured Image?
21. Theme is missing the style.css stylesheet error
22. Images
1. Beginning Basics: Getting Started with Breena
Whether you're brand new to WordPress or would just like a quick lesson on basic Breena theme features, you're in the right place! Below, we'll go through a number of how-tos regarding standard theme functions, from installing the theme to setting up your sidebar, recipe card, and more.
To skip directly to a specific section in the article, please use this index:
Change the order of buttons: Nest Post and Previews Pots
Style sheet update
Version 1.0.6 – 16 February 2017:
Update Social Media. Add Github.
Version 1.0.5.1 – 25 December 2016:
Fix error languge. The modified: inc/theme-functions.php.
Version 1.0.5 – 7 December 2016:
Integration plugin: DW Reactions.
DW Reactions is a new handy feature for Facebook that allows people to express many more feelings on each blog post than just “Like” button. This plugin will help you do the same thing over on your WordPress site.
Add options to change comment area/category title background color
Add options to change newsletter footer area background color
Fix: style.css
Version 1.0 – 22 August 2016:
Initinial release
Support WordPress 4.6
3. How do I translate my Breena's Theme to another language?
Applique’s theme is written in English, though you are of course welcome to translate them to your language. It’s possible to go through each theme file and manually the appropriate text elements using the program Poedit, or using WPML.
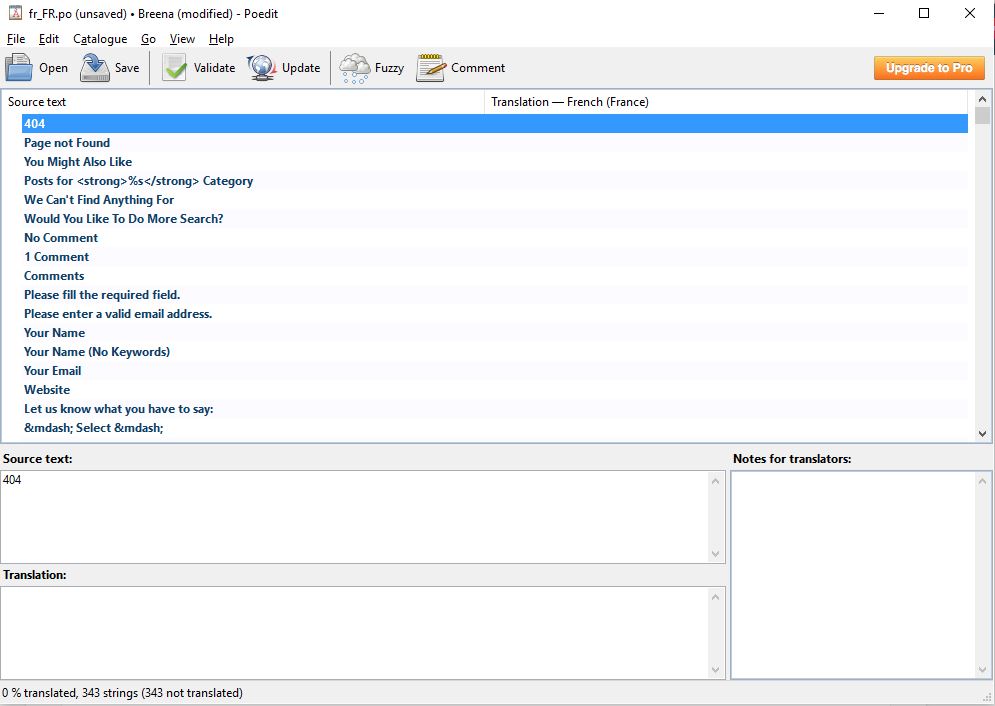
Using Poedit
Inside the Applique main theme files you will find default.po and default.mo files. This .po file is basically a list of all the text strings used in the theme files in English language, and .mo file is just the compiled export from .po file and is used by WordPress to translate the theme. Unfortunately, you need to translate the files manually, and then you need to save the translation file with your language code,
For example: fr_FR.po or nl_NL.po
You can find the right naming on this page, just search for your language and then lookup the WordPress Locale column.
So this is the full steps of translating the theme using Poedit:
We will create a new translation with poedit. Open poedit. File - > New front POT/PO file...
Go to your theme files installation and navigate to wp-content > themes > breena > languages. Open default.pot.
Then, you choose your language you want to translate and then check the lower part of the Poedit window where you will find a text area to add the correct translation. In this example in French.
When you are done translating all needed strings save the file with your language code, for example france: fr_FR.po. The corresponding fr_FR.mo file will be auto created. Make you save the file in the previous ‘languages’ folder.
Updating The Translations Catalogue
You will need to do this when new strings included after theme’s update. By doing this the Poedit will register new strings to your previously translated .po file, so you don’t need to do it again from scratch.
After you updated the theme on the new version, go to your theme files installation and navigate to Wp-Content > Themes > Breena > Languages. Open your file default.po (example fr_FR.po) using Poedit. Find update button on the top of the software windows and save your file after you translated the new strings.
Using WPML
We’ve worked directly with the WPML team to make Applique compatible with the popular WPML plugin. Below you will find documentation their team created for using WPML plugin with our theme. If you’ve purchased WPML and have any questions or issues, please check the links below.
To translate a page/posts you need to go to your WordPress Admin Panel –> Pages/Posts and in the list you will see columns for each active language, with a pencil icon (for ‘edit translation’) or a ‘+’ icon (for ‘add translation’) next to each page. Go ahead and edit or add the translated page for one of your page. if you want to use your existing page settings in the translated one you can duplicate the page by following this guide
WPML can synchronize menus for you. This means that if some entries, for example some pages, posts or categories, are in the English menu, WPML can generate and keep in synch menus for other languages pointing to the translated versions of these pages, posts or categories.
From WordPress Appearance->Menus you can see your existing menus and add menu translations and synchronize menus across translations.
4. How do I set up Breena's Instagram footer widget?
SETTING UP BREENA'S INSTAGRAM FOOTER
1 -. Ensure you have installed & activated the plugin called "WP Instagram Widget"
Once you activate the Breena theme, there will be a notification banner across the top recommending you install & activate particular plugins for the theme. One of which is the WP Instagram Widget plugin we've included stylings for in the theme. Be sure to install & activate this plugin.
2 -. Navigate to WP Dashboard >Appearance > Widgets
3 -. Drag the Instagram widget into the "Instagram Footer" widget area on the right.
4 -. Customize your Instagram Footer widget.
We recommend setting the "Number of photos" to be "6".
And choosing "Large" for the "Photo size".
IMPORTANT ITEMS TO NOTE:
Ensure your Instagram profile is set to "public". The images will not show if your profile is "private".
If changes to the widget settings are not appearing on the homepage, please ensure you've cleared any caching tool you may have operating.
5. Setting up your Newletter Widget
Breena includes custom stylings for the "MailChimp for WordPress" plugin which allows you to display a beautiful newsletter sign-up form. You can insert this form within the Sidebar area, in a special widget area beneath the Featured Area element, or in a special widget area beneath a Post on its singular post page.
6. How to change the background color of the comment section?
In the Dasboard -> Apparence -> Customize -> Custom CSS
Add the following code (replacing XXXXXX by the code of the color you want):
.post-comments {background-color:#XXXXXX;}
7. How to create a static homepage & separate blog page?
By default, your homepage will also display your post feed, listing all of your latest posts for visitors to see. If you would like to instead have your homepage be a static page and your post feed display on a separate page, you can follow these instructions.
First, create your new homepage and blog pages within WP Dashboard > Pages > Add New.
For this tutorial, we will be naming our static homepage "Home" and our post feed page "Blog".
Next, navigate to Settings > Reading. At the top of this screen, you'll see a section titled "Front page displays". Click the little bubble next to the "A static page" option. From this option's "Front page" drop-down menu, select your newly created "Home" page. From the "Post page" drop-down menu, select your newly created "Blog" page.
Be sure to save changes when you're finished.
The last step involves adding your "Home" and "Blog" pages to your navigation menu.
To do so, go to Appearance > Menus. Click the "Pages" drop-down menu on the left, check the boxes next to your "Home" and "Blog" pages, and add them to the menu. Drag and drop them to wherever you'd like them to be positioned in your menu. Be sure to save when finished.
Now, when you refresh your site, your homepage will display your newly created "Home" page and your "Blog" page will now display your post feed.
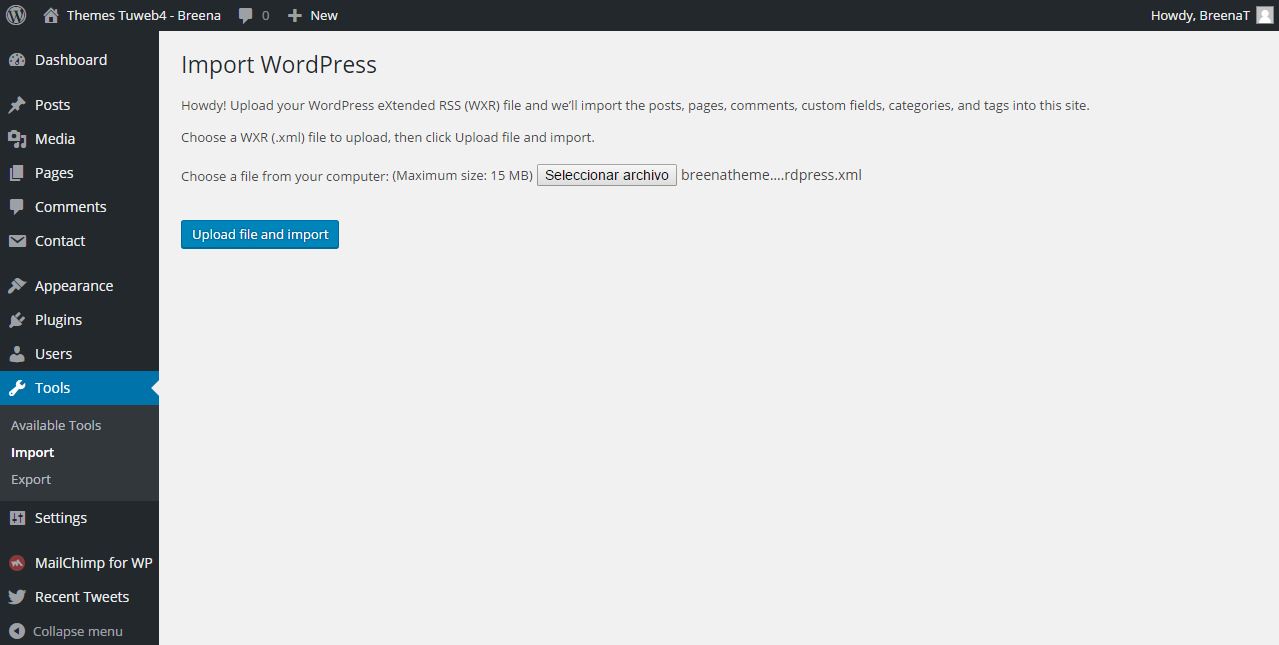
8. How To Import XML Files?
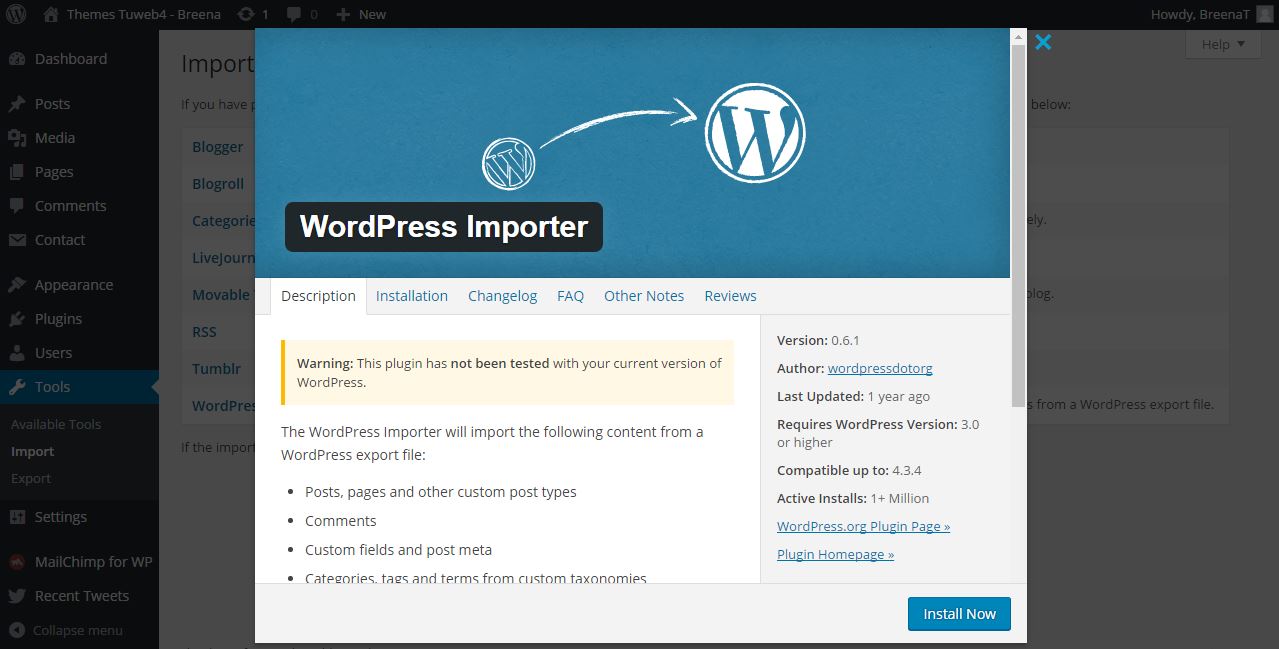
In the Tools tab in your admin sidebar, click Import.
On the Import page, select WordPress from the list and install the WordPress Importer Plugin.
Click Choose File, then choose the breena-dummy-content.xml file from your desired "Dummy Content".
Once you’ve chosen the correct file, click the Upload File and Import button.
Select admin in the dropdown list, and don’t forget to check the ‘Download and Import File Attachments’ checkbox.
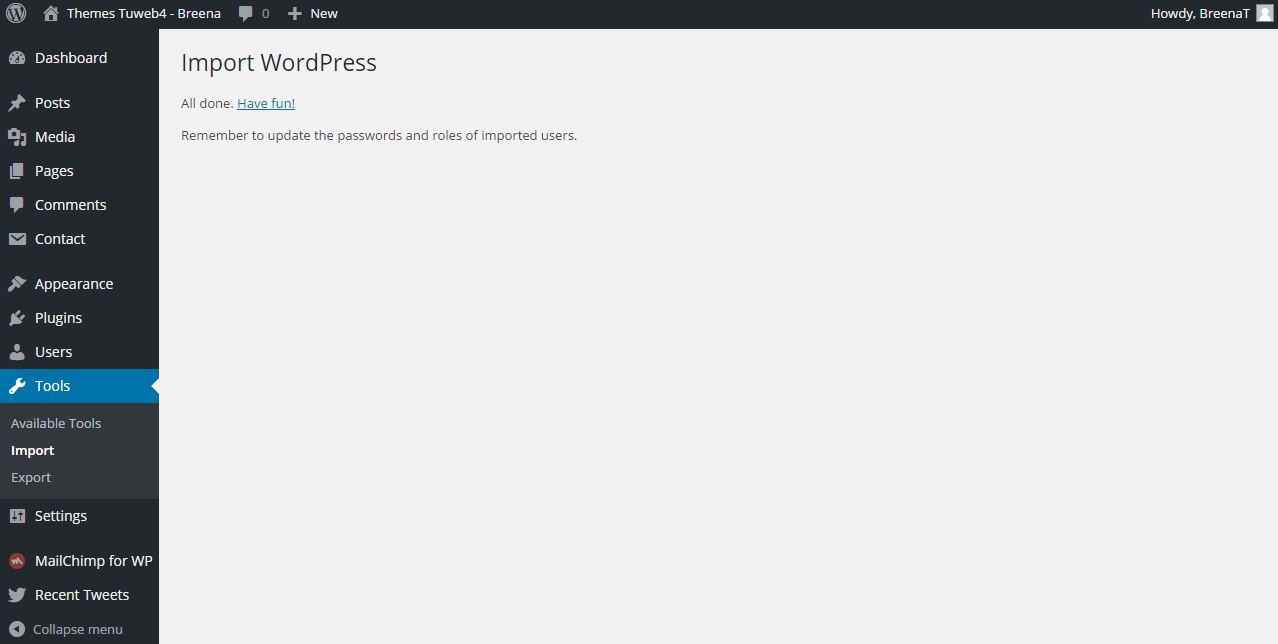
Wait until WordPress is finished importing, then click the Have Fun link to return to your dashboard.
9. Creating additional WordPress Users
You may find that you'd like to create additional WordPress Users which can log into your WordPress Dashboard for a variety of reasons. For example, to contribute in writing posts or to troubleshoot technical issues you're experiencing.
Creating a new WP User and adjusting their permissions (or "Role") can allow you to not only ensure your own personal login details are kept safe, but help control what sort of changes the secondary user can make within your dashboard.
CREATING A NEW USER
1 ) Navigate to WP Dashboard > Users
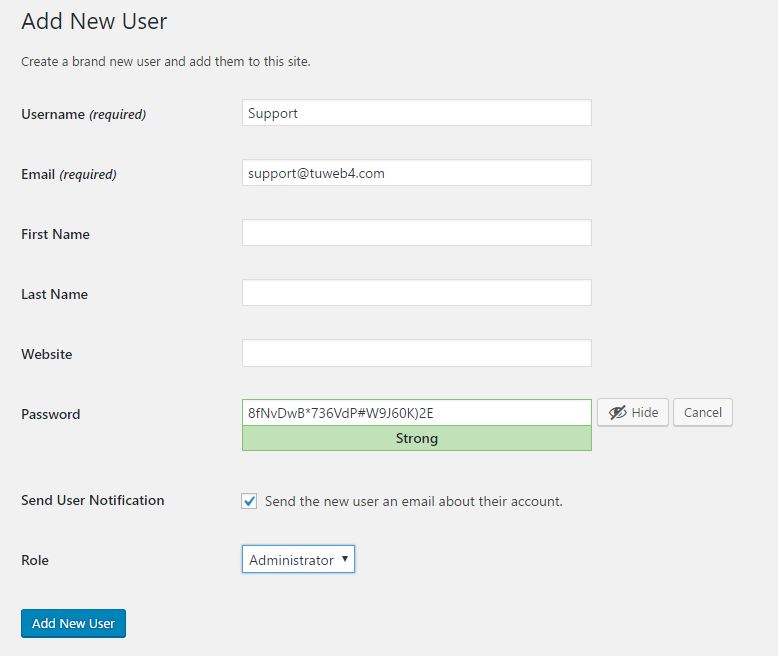
2 ) To create a new user, click the "Add New" button at the top of the page.
3 ) Enter the new Username and Email Address (required).
4 ) Fill in the user's personal details like Name and Website, if wanted (not required).
5 ) Click the "Show Password" button.
This will automatically generate a random password.
If you are creating a password for a colleague, you can change it to whatever you wish.
If you are creating a new WP User for a technical support representative to log in and troubleshoot an issue, it's fine to leave the temporary password as-is.
6 ) Choose if you'd like to email this person a notification (not required).
7 ) Select the user's Role.
There are 5 different WordPress User roles to choose from.
Each role will affect what areas of the dashboard this person can access or control.
SUBSCRIBER: Someone with very basic access, like editing their personal profile.
CONTRIBUTOR: Someone who can create and edit their own posts, but who cannot publish the post themselves.
AUTHOR: Someone who can create, edit, and publish their own posts.
EDITOR: Someone who can create, manage, and publish posts for themselves and other users.
ADMINISTRATOR: Someone with full access and permissions.
If you are creating a new WP User for a technical support representative, you will want to provide them with an "Administrator" role.
8 ) When finished, click the "Add New User" button.
EDIT USER
You can always navigate back to the WP Dashboard > Users screen and select the user you would like to manage. Here, you can change a variety of personal details about the user, including their name, adding biographical author text, social media usernames, change passwords, and more.
10. Breena Child Theme
WordPress child theme allows you to apply custom code changes to your site. Using a child theme ensures that all your customizations will not be overwritten even when you update the parent theme. Continue reading below to learn how to setup your own child theme.
What Is A Child Theme?
A child theme is a theme that has all the functionality and styling of another theme called the parent theme, which in our case, is Breena. Child themes are the recommended way of modifying the code of an existing theme because a child theme preserves all custom code changes and modifications even after a theme update. If you modify code directly from a parent theme, then update the parent theme, your changes will be lost. Always use a child theme if you are modifying core code. Child themes can also be used for a number of things, such as custom CSS applications, template file modifications, and custom PHP functions and/or hooks. There are a couple of methods to modify a child theme. Child themes don’t guarantee that an update of custom code on the parent theme will not require further maintenance. This is especially true if you copy files from the parent theme to your child theme.
Useful Documentation On Child Themes
If you’d like to learn and read even more about child themes, please follow the links below.
In order to paginate your blog post, in the Write panel in your WordPress admin, switch to the TEXT view (if you are using the Visual view) and then enter the following code to wherever you want to break the post up into a new page:
<!--nextpage-->
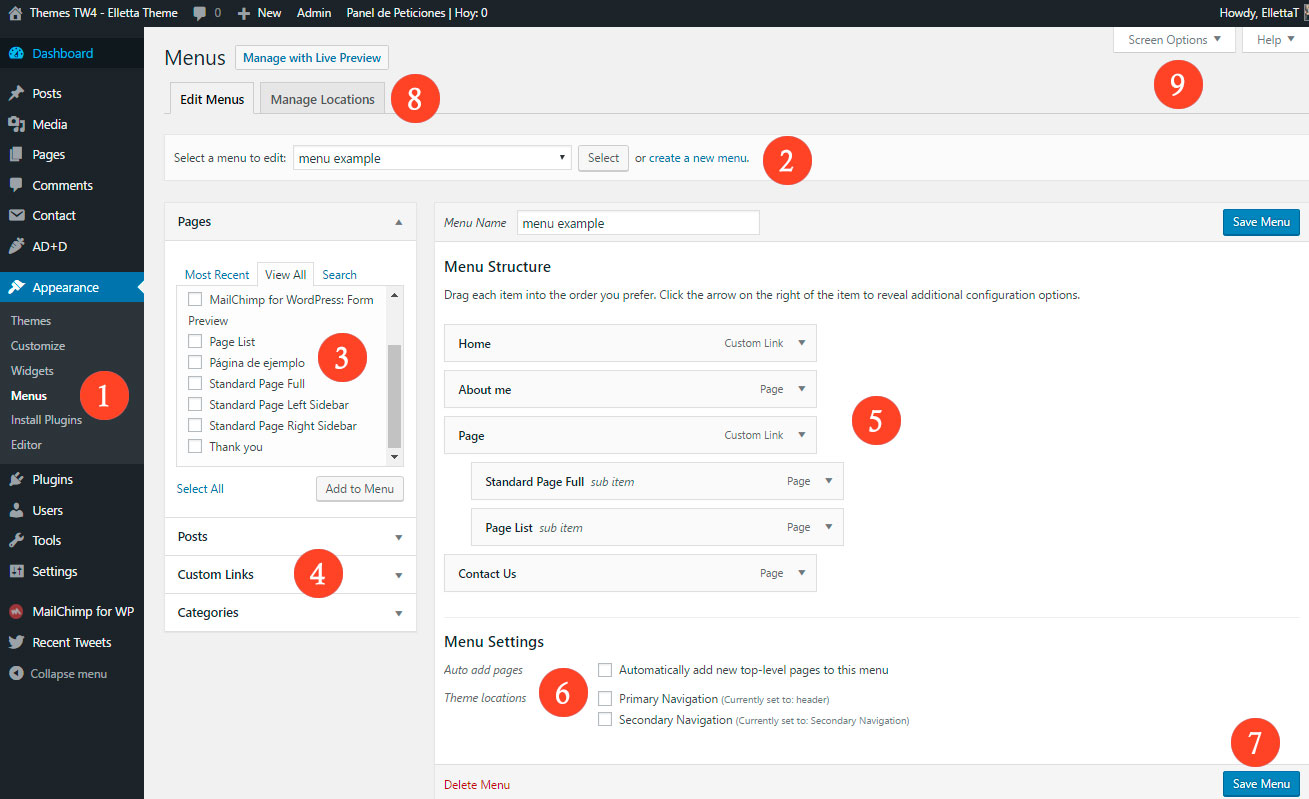
12. How do I set up my navigation menu?
Our Theme uses wordpress built-in menus feature which can be found in your wordpress Dashboard > Appearance > Menus. To setup a new menu, please follow the steps below. Its best to already have your pages created, even if they are blank pages.
Navigate to Apperance > Menus page
Click the "create a new menu" link to make a new menu. Enter the name then hit Create Menu
To add a menu item, you can easily select one of your already made pages on the left hand side and click Add to Menu
You can also add menu items by entering a custom name and custom link into the Links box.
You can manage your menus using the drag and drop functionality. To create a dropdown menu, simply drag a menu item below and slightly to the right of another menu item and it will lock into place and create a dropdown section.
After setting up your menu, select the menu you just created as the Primary Navigation in the Menu Settings and Create a new menu and select it as the Top Menu Navigation in the Menu Settings
Once its all done, make sure you click the Save button.
You can change menus locations in any time from Manage Locations tab .
You can show more boxes like "Posts", "Categories" and "Tags" by clicking on "Screen Options"
For more information on menus in WordPress, check out:
First, please be sure that you have installed and activated the Contact Form 7plugin.
Creating the form
On your WordPress Dashboard, navigate to Contact > Add New
If you would like your contact form to display in English simply click "Add New", otherwise, select your desired language
Along the top of the contact form's settings box, there are 4 tabs: Form, Mail, Messages, and AdditionalSettings.
"Form" tab: you can choose how your contact form will display with some simple HTML code. "Mail" tab: you can set up who your messages are sent to and how they will be displayed.
IMPORTANT! Please be sure to navigate to the "Mail" tab and insert your own email address within the "To:" form.
"Messages" tab: Adjust default messages visitors will receive in various situations.
"Additional Settings" tab: Option to add custom code snippets if desired.
Once finished setting up your form, click the "Save" button.
A bit of code snippet will be generated at the top of the page, highlighted in blue. Copy this code snippet as we will then paste it into a WordPress page.
Creating the page
Create a new "Contact" page (via WP Dashboard > Pages > Add New) and add it to your navigation menu if you have not already done so. ( If you're not sure how to add it to your menu, please see this FAQ article: How do I set up my navigation menu? )
Copy & paste the generated contact form short code into the text box on the create/edit page screen
And, your new contact form will appear when the page is published.
14. How do I import the demo content?
A theme's demo content XML file can be found in the theme package you downloaded from ThemeForest or Creative Market. It will be in a folder titled "Dummy Content".
On your WordPress dashboard in the left-hand menu, select Tools > Import.
Select the "WordPress" option. If you haven't used the WP Importer before, you may need to first install it and activate it (it will give you this option on the spot if required).
You will be redirected to this screen, where you can upload the demo xml to start the import process
In the new screen you can assign user(s) from your site to “receive” the demo content from us.
IMPORTANT: you need to click the “Download and import file attachments” option to import all the images from our demo.
click on Submit Button
Wait until you get this “All done. Have Fun” notice
15. Add a newsletter sign-up form to Breena
By default, Elletta doesn't have a newsletter sign-up form included in the theme, however it is possible to add this functionality with the help of the Mailchimp for WordPress plugin.
In order to add a MailChimp newsletter sign-up form widget to your sidebar, you can follow the instructions below. We'll need to create a MailChimp Account, install the necessary plugin, and then set up your newsletter widget.
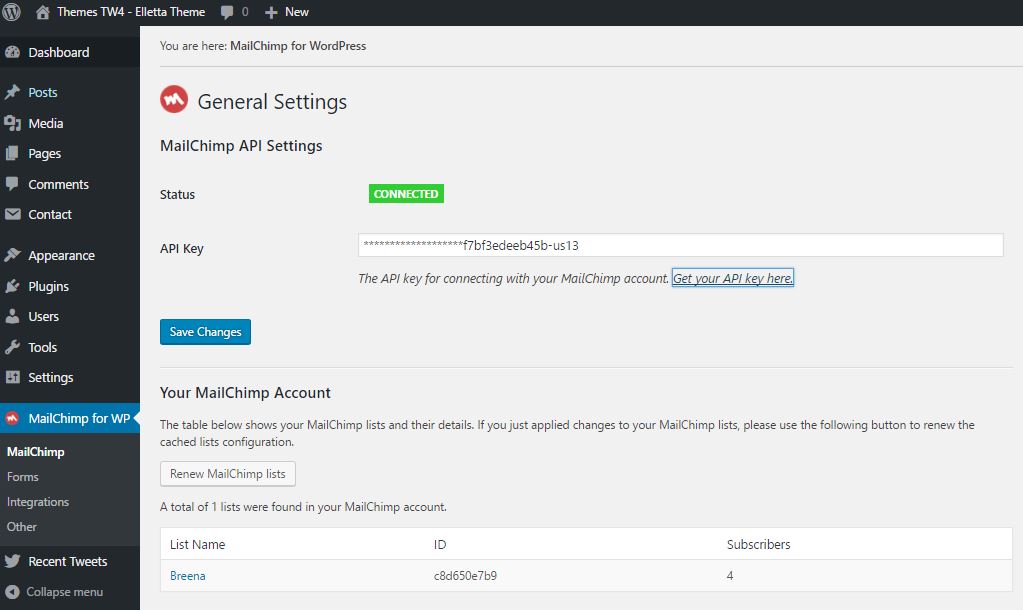
1 -. SIGN-UP FOR MAILCHIMP
First, please ensure you have signed up and created an account with MailChimp. Once you have done so, your account will be given a unique "API Key" number. This API Key is used to link your MailChimp account to your WordPress.
To find your MailChimp API Key: Log into your MailChimp account > Your Account Page > Extras > API Keys > Create a key.
Installing the Mailchimp for WordPress plugin: Log into your WordPress Dashboard > Plugins > Add New > Search for term "MailChimp for WordPress" > Install Now > Activate Plugin.
Once installed, navigate to the plugin's Settings page. Here, you'll want to copy and paste your MailChimp account's API Key into the form and click "Save changes".
3 -. SETTING UP THE NEWSLETTER WIDGET
To customize your newsletter form, you can navigate to WP Dashboard > MailChimp for WP > Forms. On this screen, you can determine just how your newsletter form displays.
Copy and paste the following HTML code into the box on this page:
<p>
    <label>Subscribe to my Newsletter</label> /* this line is optional */
    <input type="email" id="mc4wp_email" name="EMAIL" placeholder="Your email address" required="">
</p>
<p>
    <input type="submit" value="Subscribe">
</p
This will have your widget display a heading of "Subscribe to my Newsletter", an email input field, and a submit button. Save changes when finished.
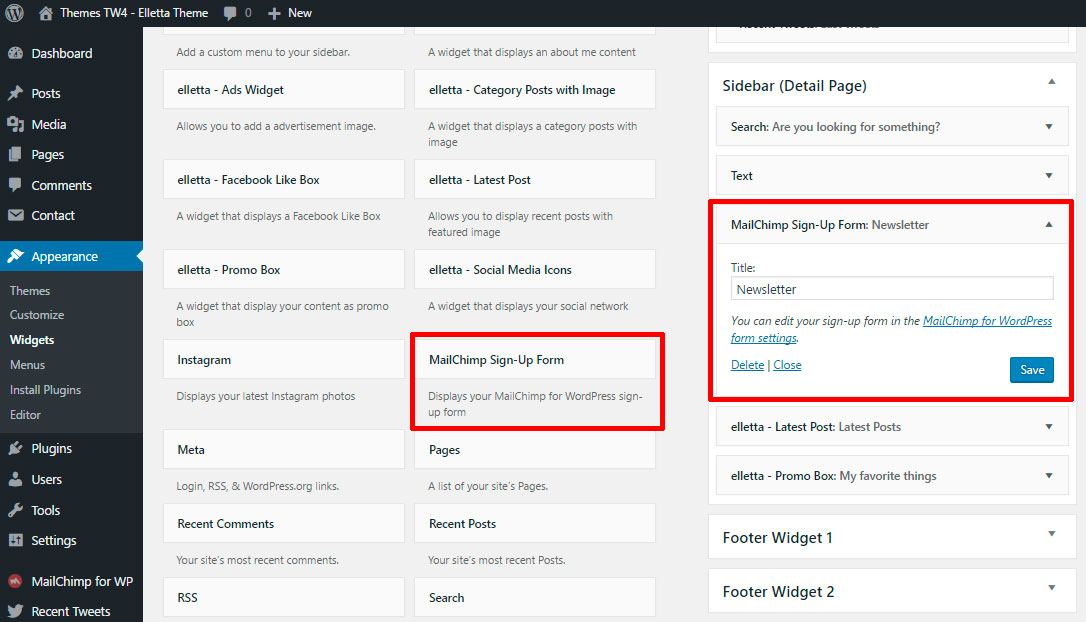
4 -. INSERT THE WIDGET
Lastly, navigate to WP Dashboard > Appearance > Widgets.
A new widget titled "MailChimp Sign-Up Form" will have appeared. Drag and drop this widget into your Sidebar or Footer area.
If you'd like help changing the colors or styling of the newsletter widget, feel free to open up a new support ticket and let us know!
16. WordPress Theme Installation (Incl. Demo Content and plugins)
I will install your WordPress Theme the RIGHT WAY!
Promotion: purchases to 31 December 2016
My service includes:
Installation of Breena WordPress Theme.
Customization of your Theme as the exact look and feel of the demo website.
Installation of your Theme's default plugins.
Installation of your Theme's Demo content.
Customization of your Theme as the demo website.
Expert Friendly Support.
17. How to Include Google Analytics Tracking Code?
Copy the code given to you by Google Analytics
Go to WordPress > Appearance > Customize > Custom Javascript > look towards for Header Code box.
Paste your Google Analytics (or other) tracking code here. This code will automatically be inserted into the head of your theme on every page.
Click Save Changes. That’s it!
18. How to Include Custom CSS?
Go to WordPress > Appearance > Customize > Custom CSS > look towards for Header Code box.
Paste your Custom CSS.
Click Save Changes. That’s it!
19. How can I customize the background to the body?
It can be done with the custom css. In your Dashboard: Apparence -> Customize -> Custom CSS
body {
background-image: url('url-image');
background-repeat: repeat;
}
20. How do I add a Featured Image?
What is a Featured Image?
A Featured Image is a representative picture for your post which is used in a number of areas & functions, like on the homepage, post page, related post areas, recent post widgets, featured area sliders, etc..
How do I assign a Featured Image?
To assign a Featured Image to a post, navigate to your post's create/edit screen and look to the bottom-right. Here, you'll see a box titled "Featured Image" where you can add your desired image. Be sure to update your post when you're finished.
21. Theme is missing the style.css stylesheet error
A common issue that can occur when installing a WordPress themes is “The package could not be installed. The theme is missing the style.css stylesheet.” error message being displayed when uploading or activating the theme.
IMPORTANT! It is possible that after theme activation are images wrongly cropped and look ugly!
In this case use this plugin: http://wordpress.org/extend/plugins/regenerate-thumbnails/ to regenerate old thumbnails from previous theme.
After plugin installation start regeneration in Tools > Regen. Thumbnails This process can take a while and you cannot close tab/window until regeneration is done.
Images and thumbnails are generated automatically.
To display thumbnails correctly upload images via WP interface using "Set featured image" button.
After image upload set featured image.